Balsa “2001: A Space Odyssey” Model
Projects of 2025
Politically, 2025 looked liked it was going to be a shitty year. And that indeed was borne out. But I had decided right from the start that I was not going to let a year slip by and be wasted due to bullshit that was outside my control. (Never mind wasting four years.)
I’ve read about thru-hikers that hike one of the Triple Crown trails in the U.S. such as the Pacific Crest Trail—they will go long stretches with little or no news of the outside world. I envy that more and more.
Let’s not mention it again.
Looking back at 2025, I thought I would reflect on, write about, some of the things that I worked on. This is just one post, others will follow.
But first, there is often a thing I have found that ties together many of the projects that I embark upon. Often I seem to try to create a thing that I wish had existed when I was a kid. What follows in this post is an example of such a project.
I was fascinated by the spacecraft from the movie “2001: A Space Odyssey” that I saw (in a theater!) when I was young. I also found fascinating the balsa airplane kits whose cardboard boxes were stacked along shelves in the hobby store I frequented. I built a few of these when I was young (although they were generally a bit above my skill levels at that age). Never though was there a balsa kit of any spacecraft from the film, “2001: A Space Odyssey”.
In 2025 I suceeded in remedying that.
Balsa “2001: A Space Odyssey” Model
There are modest CO2 lasers that are fairly affordable and a reasonable size that allows you to place them on a desktop. One shortcoming however is the rather small area that they can act upon with their laser—about the size of a sheet of letter-size paper. The other shortcoming is that laser power is kind of middling.
Something I really enjoy with a laser cutter however is cutting thin balsa parts with precision and assembling those pieces into a model aircraft—or even a model spacecraft.
The modest laser cutter handily goes through the balsa sheeting. The cutting area though is my only real limitation. Balsa sheets often come in lengths of 36" with a width of typically 4" or so. The biggest piece that I can put under the laser then is going to be about 12" by 4". Some parts have to be broken down in order to fit within this size. It has not been a big deal though.
The spacecraft from the movie “2001: A Space Odyssey” have always had a special place for me. From a design standpoint these fictional spacecraft have never, in my opinion, been bested. They seemed at the time like they had been lifted right out of actual NASA proposal for future spacecraft. (Not a surprise given the background of the technical experts that assisted on the film.)
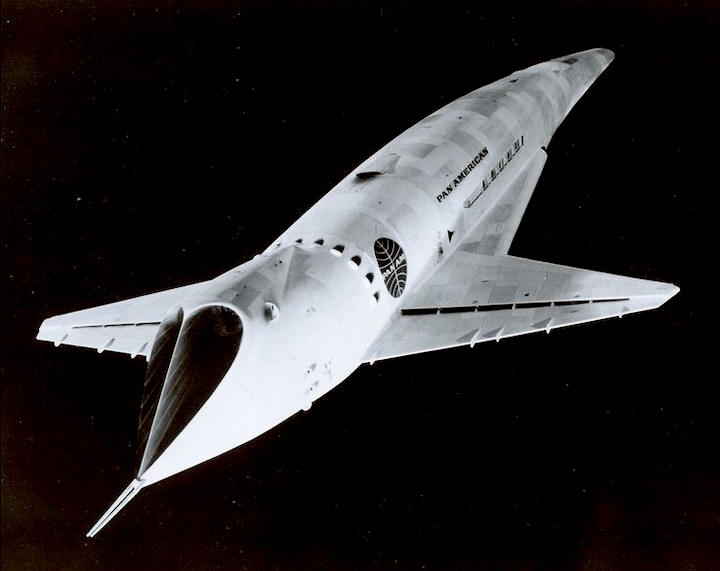
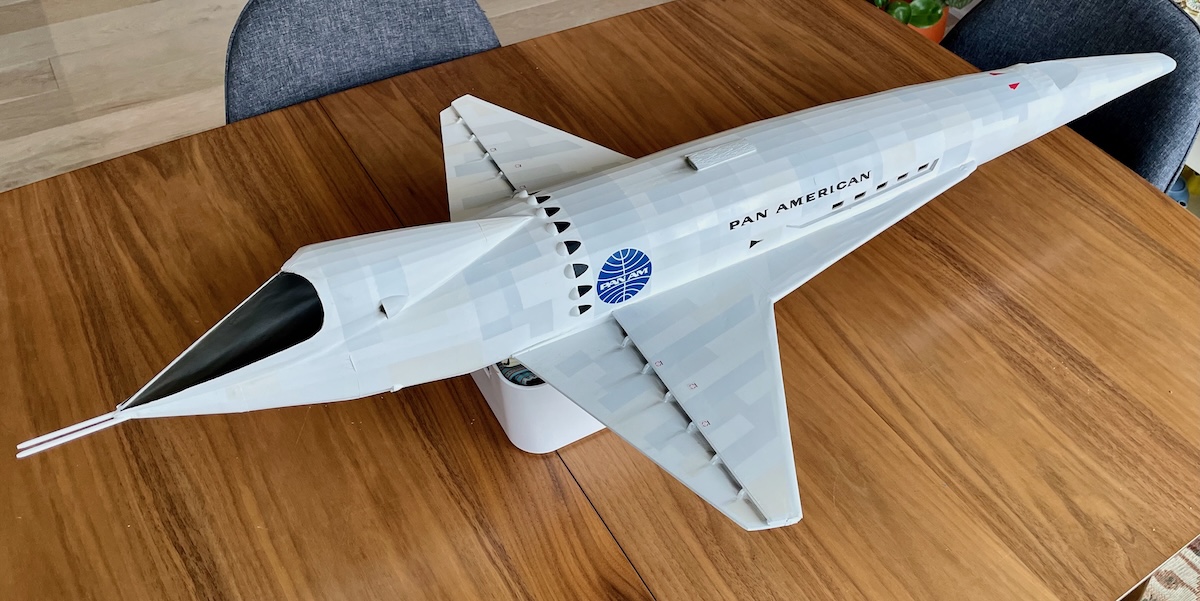
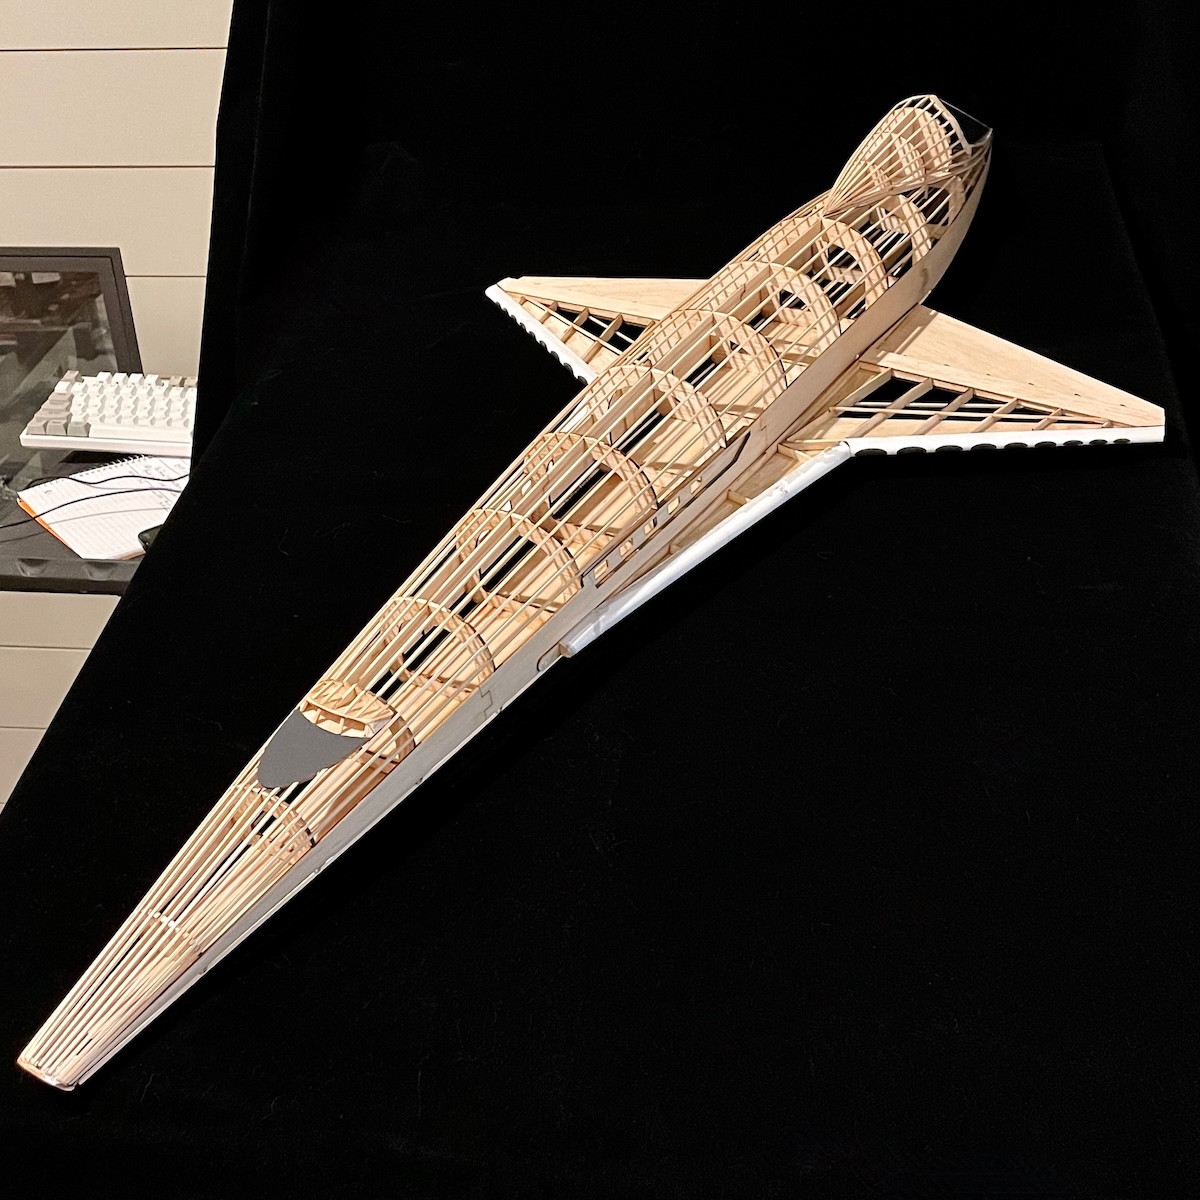
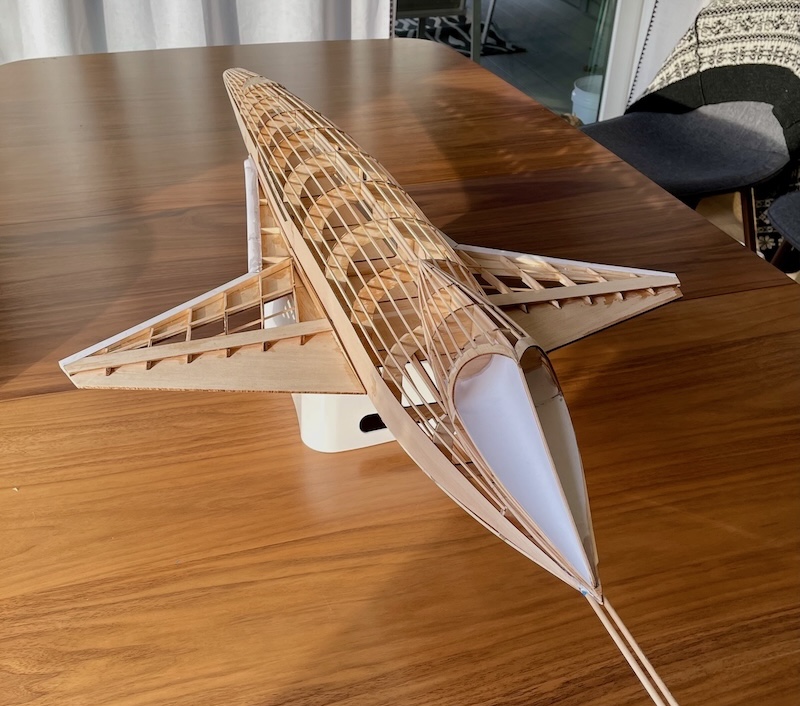
Some of you may remember the shuttle-like spacecraft (called the Orion space clipper) that we see early on in the film with the (now-anachronistic) “Pan-Am” livery. I decided to try and build a balsa version of this spacecraft in the manner that other balsa, model aircraft have been constructed. I would try to determine the shapes of a number of balsa “ribs” (about 14 of them) and then use thin balsa sticks called “stringers” to run lengthwise along the outer-edge of the ribs to give the spacecraft fuselage its form.
“Studio scale” is a term used among modelers to refer to the size of the actual filming model. The model used in a movie is often large so that there can be enough detail to make it look convincingly large. (The plastic models that they might offer as a kit for sale are, unsurprisingly, often quite a bit smaller.)
Unfortunately for “2001” though, Kubrick purportedly kept the models locked away until they were eventually binned when no one was willing to continue to pay for storage. Nonetheless, the model community has weighed in and put the length of the filming model at something very close to 44". And so I targeted 44" for the length of my balsa model.
The laser cutter wants a file that has the cuts defined by paths—mathematical curves. If you are familiar with computer “drawing” programs (like Adobe Illustrator) then you know that these tools do just that. Using the computer to describe a circle, for example, is a natural fit for a laser that is being moved with stepper motors in very precise paths over the material it is cutting.
I hate Adobe and their subscription model and so have been buying and using Affinity apps for years now. Affinity Designer is the analog for Adobe Illustrator and is more than capable of allowing me to create the shapes I want cut from the balsa. An open-source contender would be Inkscape which I have only briefly explored (and so can add no value in recommending).
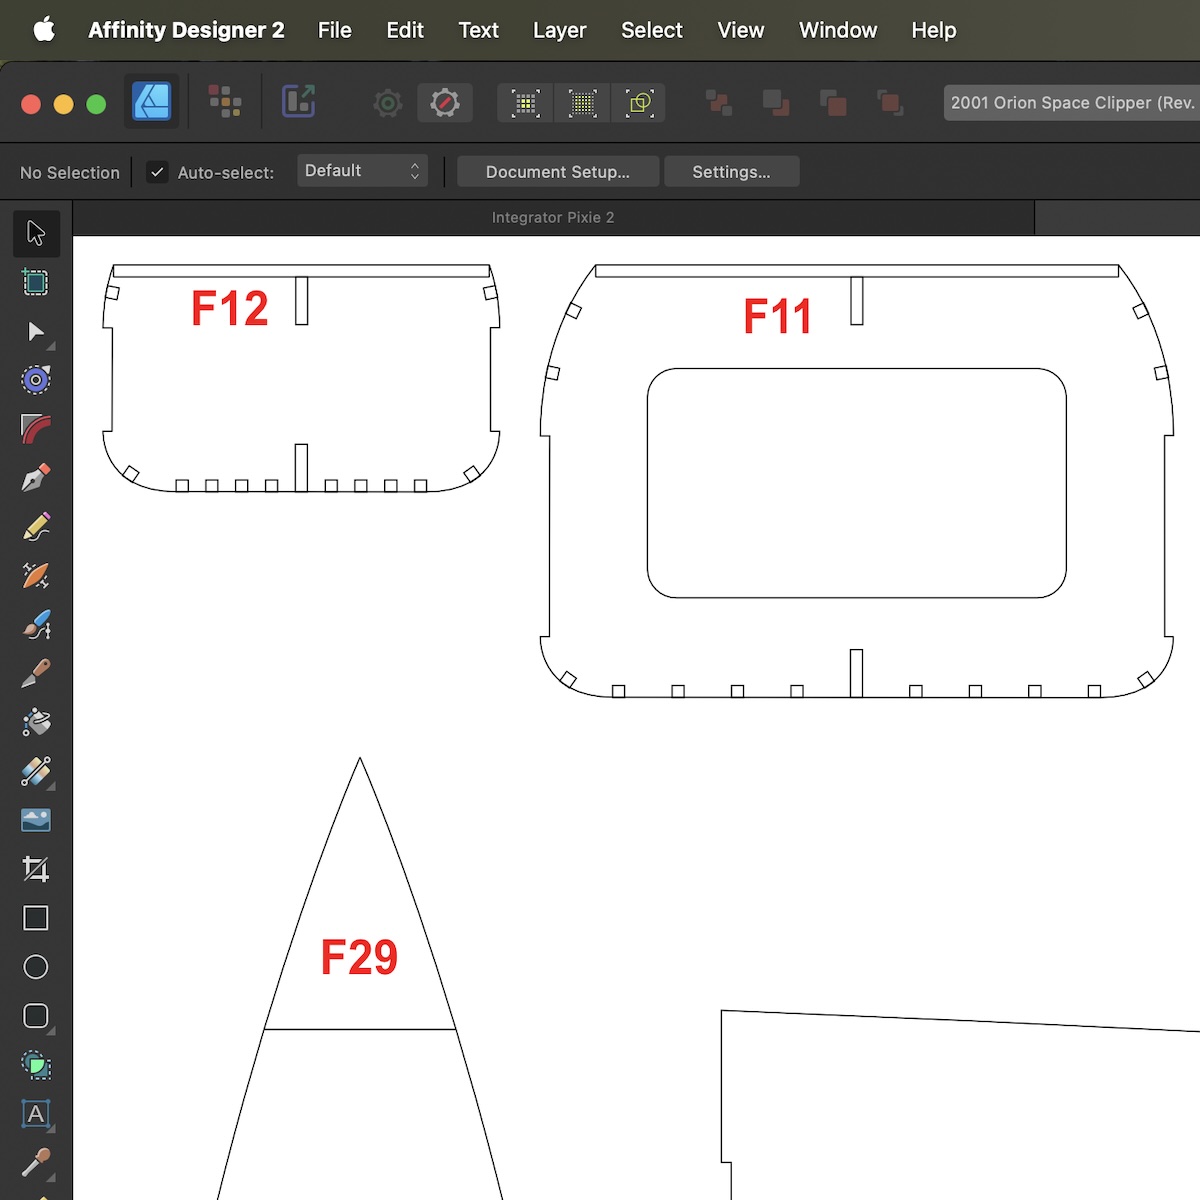
There really is no magic to it. You lay out shapes/paths that will correspond to the laser cuts you want. The “art" (or science) of course is determining what shapes, when strung together, will give the right form that you are after. To that end there were a number of blueprint-like, “3-View" drawings that I found online. There are stills from the film as well but you have to use your mind’s eye a bit to imagine those in the X-plane, Y-plane, etc.
And my favorite trick is always iteration. Make it how you think it’s supposed to be, build it, and then look at the result with a very critical eye. Make notes and then tweak your Designer artwork, laser cut more balsa, build it again.
In fact I often make notes in marker/pen directly on the balsa during construction. Notes like, “Maybe need an extra rib here" or “F1 came up 1/8" too short." I later act on these notes through changes to the source Designer file.
When I was happy with the balsa form of the model, I switched over to covering it. The balsa airplane community uses a kind of heat-shrink plastic covering called Monokote™. You typically cut out a piece of the thin plastic film to cover a specific area of the model like the upper surface of one of the wings. One surface of the plastic has a thin film of heat-activated adhesive so that you can use a small electric iron to hold down the film to the balsa ribs and stringers (also called longerons).
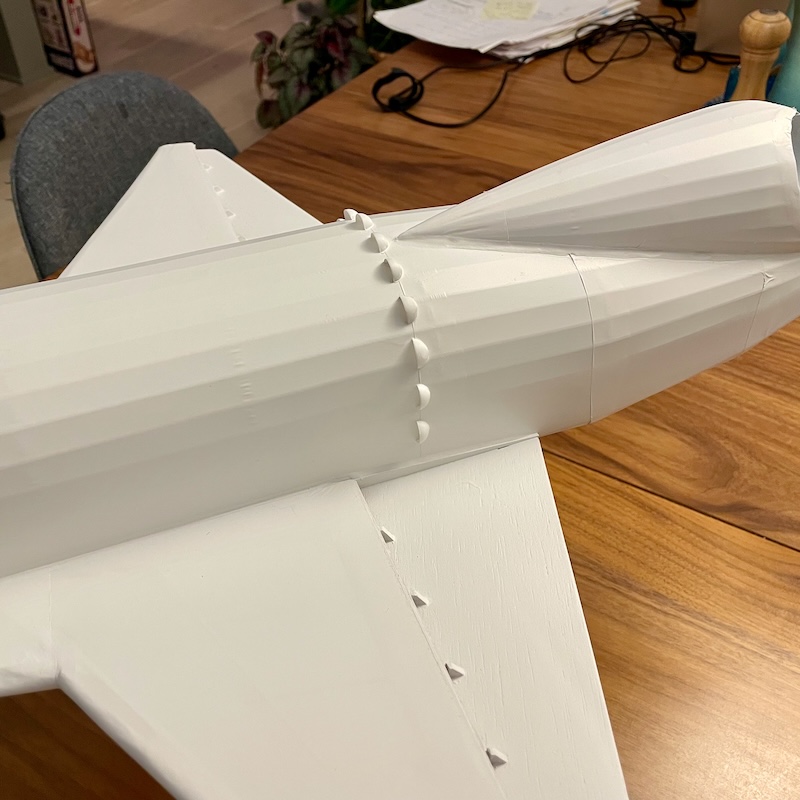
When the film is finally secured to the balsa a heat gun is then used to apply heat to the film and shrink it to a tight fit. To be sure there is an art to this, but if you are patient and careful, you can get a pretty nice covering that is hopefully wrinkle-free and hugs the contours of the model.
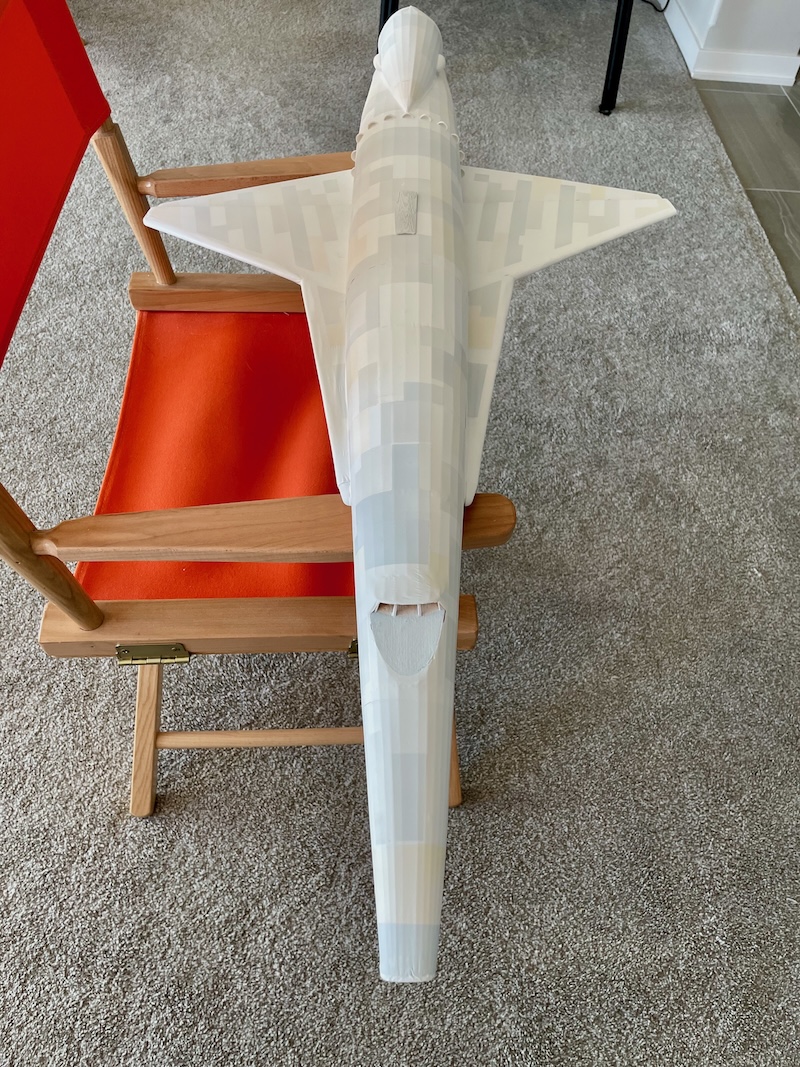
The final steps were to paint the covered model and apply decals.
Following a pattern that others had come up with (from carefully studying frames from the film), I proceeded to mask off a number of portions of the model and used various shades of grey to get a kind of paneled look.
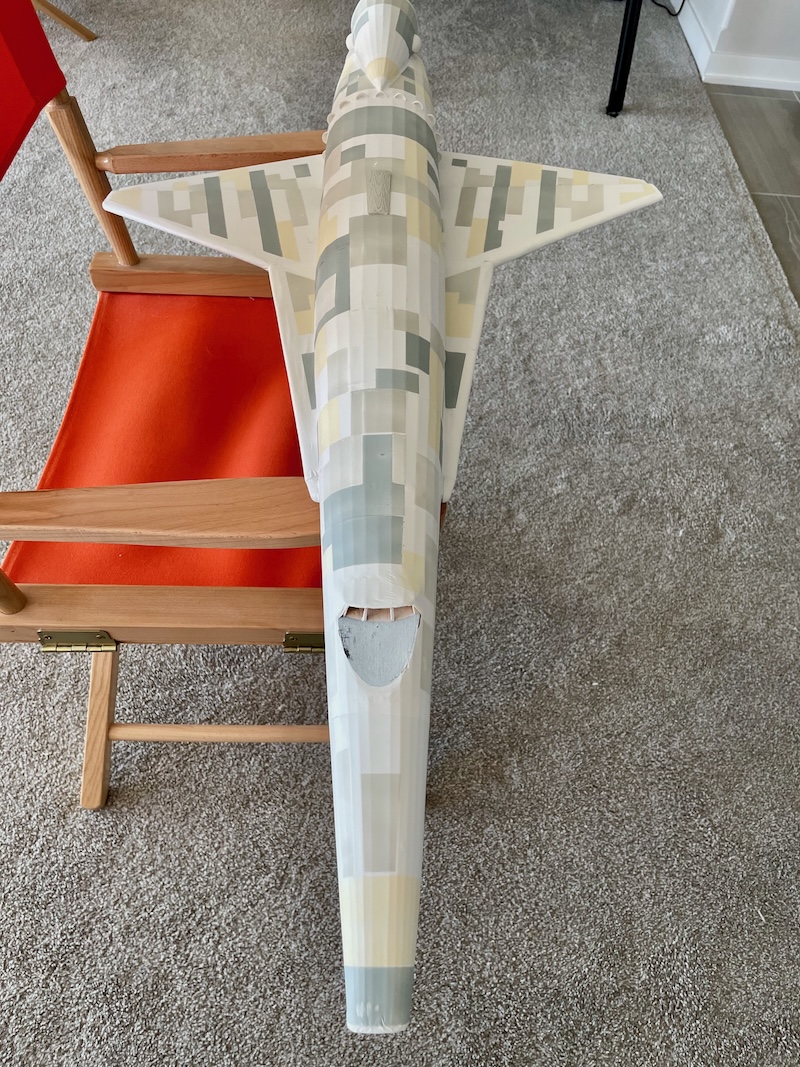
Despite the rather crazy, patchwork look of the model at this stage, the next stage involves carefully and repeatedly spraying coats of white paint over the model to take down the patchiness. Doing it this way gives you a good deal of control over the contrast of the panelling. Each light coat of white paint takes the model closer to the original even white color. You stop at whatever point looks good to your eye.
Finally, decal artwork was created using Affinity Designer as well. There are sites online that can take your artwork and print water-slide decals. These are the kind of decals that you may be familiar with if you have built plastic models before.
So I created a file with the Pan-Am logo, a few runs of text and some smaller markings and sent it off for printing. The decals I got back were beautiful to behold. After affixing them to the model I finished it off with a clear matte coat to dull the model.
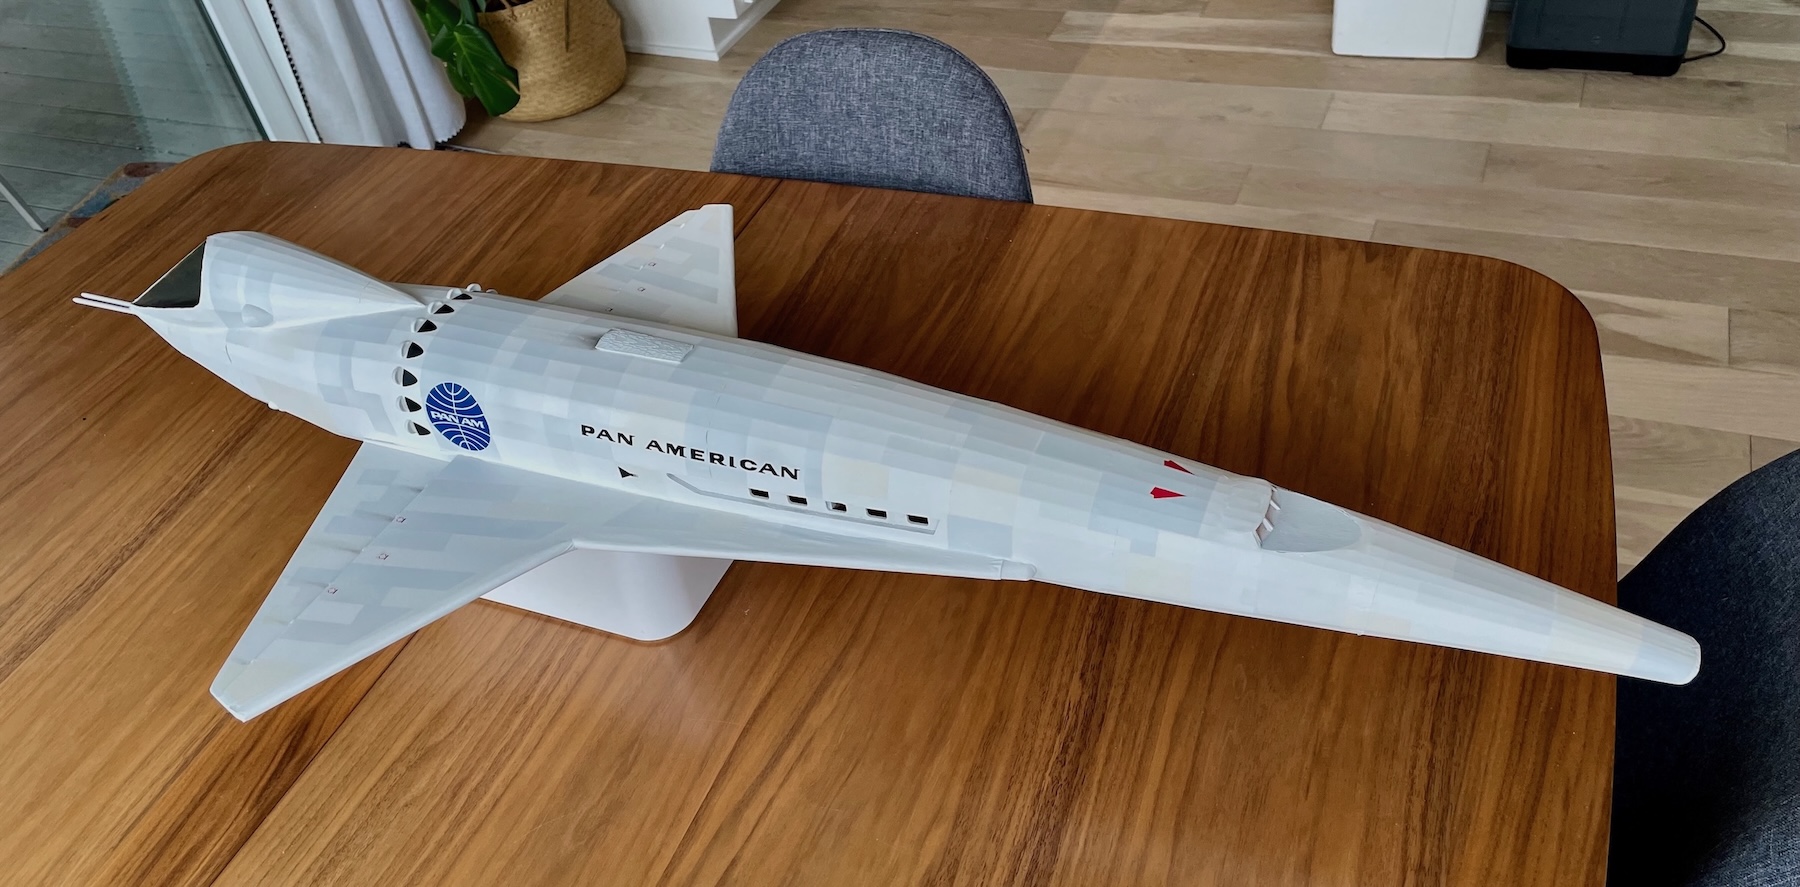
It is not meant to fly—more a presentation kind of model. And to be sure, while it looks nice, it doesn’t hold up to the kind of scrutiny a filming model would. Up close, little details give away that it is a balsa model covered with a heat-shrink plastic film.
Model making of this kind taps into some joy I have for a kind of “sculpting". The physical form and shape of the spacecraft model appeals to me for some reason, and so realizing it in a large scale is something I am attracted to. There is a technical draw I feel—almost like engineering or architectural—in figuring out how to decompose the form of the model to cross-sections and profiles that will go together to reconstruct that form.
I’ve iterated on the model enough to feel comfortable moving on from it. (Ship it!) After having covered it though I find I am wishing I still had the naked model with all the balsa stringers and formers for the world to see. I may then build it one more time but stop before covering it. I’ll have then the two models to display.
I like to share everything that I do so that others can build the thing if they like. To that end I really need to clean up the Affinity document—lay it out neatly in the form of a plan that others can follow. Perhaps I’ll export it as a PDF that can be printed full size.
I’ll update this post if I finally do that. (Or if too much time passes and I still have not had the time to clean it up, I’ll probably post the file as is—let others figure it out for themselves.)